I learned early that iso invariance can change how I shoot in tough light. When I underexpose, I often recover shadows later and keep noise low. This method helps me save detail in highlights and shadows without losing image quality.
In practice, an iso invariant camera lets you treat amplification differently. You can reduce camera iso at capture and lift tones in software. That approach preserves more information from the sensor and helps control noise during editing.
My goal in this guide is simple: show how the signal amplification in your camera works and why it benefits your workflow. I will break down stops, values, and dynamic range into steps you can use today.
Key Takeaways
- iso invariance helps recover shadows with less noise when done correctly.
- An iso invariant camera changes exposure choices for tricky scenes.
- Understanding amplification and sensor behavior improves final image quality.
- Use low camera iso and lift in software to protect highlights and detail.
- Practicing this technique boosts your control over dynamic range and noise.
Understanding ISO Invariance Explained
Let me show how a sensor’s gain behavior changes the way I expose and edit photos. I define iso invariance as a camera’s ability to show similar noise whether you expose correctly or underexpose and brighten later. That idea shifts how I think about exposure when light is scarce.
Defining the concept
Read noise and photon noise are different beasts. Photon noise comes from the light in the scene and cannot be removed. Read noise is produced by the camera’s electronics when the sensor is read.
When a camera is camera iso invariant, read noise is low enough that lifting shadows in software yields similar results to shooting at a higher in-camera setting. That lets me protect highlights and retain detail in both bright and dark areas.
The role of read noise
Read noise determines whether analog gain helps or not. If the sensor’s read noise dominates, using high iso at capture reduces noise. If read noise is tiny, I can shoot darker and amplify the signal in post without penalty.
- I look at read noise first when I evaluate a camera for low-light work.
- I distinguish analog gain on the sensor from digital brightening in Lightroom or Capture One.
- Understanding these values helps me control amplification and get cleaner images.
“The sensor is the single most important part when you want a clean, low-noise image.”
The Difference Between Analog and Digital ISO
I learned to treat analog film and digital gain as two very different tools in my kit. Analog sensitivity meant changing film to match light. The emulsion itself reacted to photons and set the exposure.
Digital gain is different. When I raise the camera ISO value, the sensor does not become more sensitive to light. Instead, the camera applies electronic amplification to the signal after the sensor is read.
That difference changes my choices. I often keep the camera at base camera ISO and underexpose slightly. Later, I lift shadows in software to protect highlights and retain detail.
- I remind myself analog and digital are distinct processes that affect exposure and quality.
- Using higher ISO used to mean swapping film; now it’s electronic amplification of the signal.
- My tests show read noise drops in importance at base ISO, so boosting in post can give cleaner photos.
“Keeping the sensor at base ISO often preserves highlight detail and reduces visible noise.”
Why Invariant Sensors Matter for Dynamic Range
In high-contrast scenes I learned to protect highlights first and fix shadows later. That change in thinking gives me more control over the final image when the light range is large.
Preserving Highlight Detail
I aim to avoid clipped highlights at capture. With iso invariance on my list of priorities, I underexpose slightly to keep bright areas intact. Then I lift the dark parts in post.
Why this works: An iso invariant camera keeps read noise low enough that pushing shadow tones in software does not destroy quality. The sensor handles signal amplification cleanly, so the result shows less visible noise than if I had used a higher iso and risked clipping.
- I found an invariant camera is powerful for very wide dynamic range scenes.
- By underexposing I protect highlights and recover shadow information later.
- Low read noise makes software lifts effective without heavy noise penalties.
- This beats raising camera values that can clip bright stops before the shot.
“Holding highlights and lifting shadows in RAW is the simplest way I’ve found to maximize detail and reduce noise.”
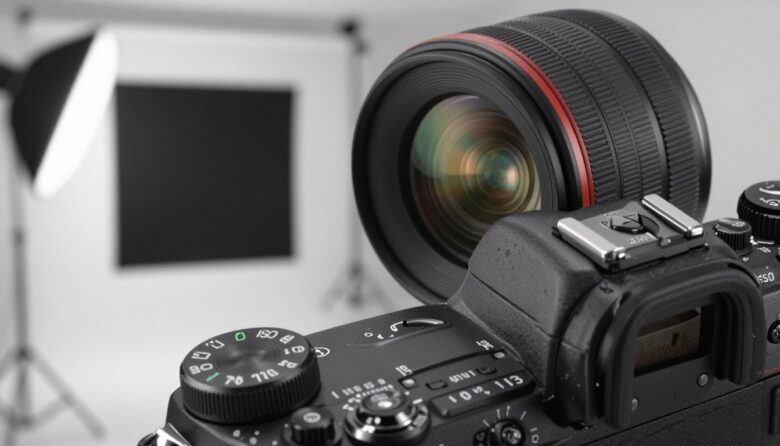
Identifying Your Camera Sensor Type
To know if my gear is camera iso invariant, I start with simple, repeatable tests.
Manufacturers rarely list iso invariance on spec sheets. So I rely on community data and hands-on checks. Sites like Photon to Photos give useful comparisons for models such as the Sony A7RII and Fuji XT1.
I also check cameras iso specifications to spot ranges where read noise drops. That helps me see if analog amplification changes the noise floor across values.
In practice, I compare an underexposed RAW to a properly exposed file. If lifting shadows produces similar noise, the sensor shows iso invariance behavior. If noise rises sharply, the sensor gains benefit from higher camera iso at capture.
“Test your own gear before you rely on this technique in critical shoots.”
| Check | What to do | What it shows |
|---|---|---|
| Community data | Review Photon to Photos tests | Model-level read noise trends |
| Spec review | Scan camera iso and read values | Possible low-noise ranges |
| Hands-on test | Shoot pairs and compare lifts | Real-world noise and detail |
| Final decision | Choose underexpose or raise ISO | Better highlight and shadow control |
How to Test Your Camera for ISO Invariance
I run a simple controlled test to see how my camera handles amplification and shadow recovery. This shows whether I can safely underexpose and lift tones later, or if I need to raise gain at capture.
Setting Up the Control Shot
Mount your camera on a tripod and switch to manual mode. I take a properly exposed control frame at iso 6400 to serve as the reference for noise and detail.
Capturing Test Exposures
I then shoot a series at iso 100, underexposing in 1/3-stop steps. I keep the same lens and framing and repeat with other lenses to check consistency.
Analyzing Results in Lightroom
I import the files and use “Match Total Exposures” to align brightness. Then I compare noise, read noise behavior, and detail in shadows and highlights.
- If the pushed low-ISO files match the control, I have a camera iso invariant workflow that preserves image quality.
- If noise differs, the sensor needs higher camera iso in some ranges; modern cameras with dual-gain can be invariant only at certain values.
“A quick tripod test reveals how far you can push shadows without ruining final quality.”
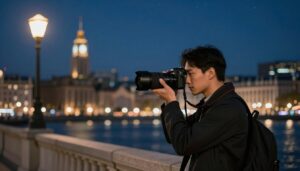
Practical Applications in Night Photography
On clear nights I prefer to protect the stars by exposing for highlights and lifting the rest later. Night photography often has extreme contrast between stars, light sources, and dark foregrounds. That makes an iso invariant camera a great tool for these scenes.
I usually start at iso 100 to avoid clipping bright stars and nearby lights. Then I underexpose the frame slightly and plan to bring up shadows in post. The low read noise on many modern sensors means that lifting shadow tones keeps noise under control.

When I shoot the Milky Way I sometimes compare an image shot at iso 6400 to one shot at iso 100 and pushed in editing. If the pushed file holds detail, my workflow favors the lower in-camera gain. This preserves color and gives a cleaner final image.
Practical checklist I follow:
- Protect highlights first to avoid clipping.
- Underexpose modestly and rely on low read noise.
- Use conservative exposure values and gentle amplification in RAW.
- Plan shots around the scene’s brightest points to keep natural star color.
“Underexpose for highlights, lift shadows later, and you’ll often get cleaner night photos.”
Managing Noise and Highlights in Post-Processing
Cleaning up underexposed files starts with the right noise tools and a clear plan. I approach pushed RAWs by assessing shadow noise and highlight headroom first. This helps me decide whether to push exposure or rely on denoising.
Using Noise Reduction Software
Modern AI-based denoisers do a lot of heavy lifting. I use them to remove luminance and color speckle after I lift shadows. They recover detail better than older tools, especially when the camera shows iso invariance behavior.
That said, pushing shadows too far can create banding and artifacts. Even on an iso invariant sensor, color shifts appear if you overdo the sliders. I avoid extreme boosts and work in small steps.
My routine:
- Expose to protect highlights, then lift shadows modestly.
- Apply targeted denoise to shadow areas, keeping midtones sharp.
- Use local masks to preserve fine detail in key parts of the image.
“Noise is already present in the shadows; software helps, but it does not create missing data.”
| Task | Tool | When to use |
|---|---|---|
| Shadow recovery | RAW exposure slider + curves | When highlights are intact and shadows need lift |
| Global denoise | AI denoiser (Top-tier) | After exposure adjustments, before sharpening |
| Local cleanup | Masked noise reduction | When texture must be preserved in faces or foliage |
Common Misconceptions About ISO-less Shooting
I often hear people say an iso invariant camera makes a body inherently better. That is misleading. An iso invariant camera gives more exposure choices, but it does not fix poor light.
Light deprivation, not a setting, causes most noise. If you underexpose too far, the lack of photons shows up when you brighten the file.
A common myth is that you can always shoot at the lowest value and brighten everything later with no cost. I found that extreme underexposure can cause color shifts, banding, and lost detail that are hard to recover.
Read noise is the real limiter. If the sensor’s read noise is low, you can push shadows more safely. But every sensor and every camera iso invariant behavior varies by model and range.
“Proper exposure remains the best route to clean photos — iso-less workflows are a tool, not a cure-all.”
- I remind myself that an iso invariant approach adds flexibility, not guaranteed superiority.
- I test my cameras and watch read noise before relying on heavy amplification.
- I expose to protect highlights and lift shadows modestly to keep noise manageable.
Optimizing Performance with Dual Native ISO
I started checking my camera’s dual native points after noticing odd noise jumps between values. Modern cameras with dual native design often give two specific native iso settings where the sensor performs best.
Set your body to a native iso when possible. These points reduce read noise and preserve dynamic range better than intermediate values. I learned that using higher iso values between native steps can sometimes introduce more noise than selecting the next native setting.
For example, if a body favors iso 100 and iso 6400 as its native points, shooting at a midpoint can hurt image quality. The sensor’s second amplifier engages at the higher native, giving cleaner shadows and better overall noise control.
I check my camera manual and test a few frames to confirm native iso numbers. When I pair this with iso invariance techniques—underexposing at a native low point and lifting in post—I keep highlights safe and recover shadow detail with less penalty.

“Using the native iso steps gave me cleaner shadow detail than nudging values between them.”
- I found dual native designs useful for tough low-light photography.
- Choose a native iso for peak sensor performance and lower noise.
- Combine native points with invariance-aware workflows to maximize dynamic range and cleaner shadows.
Essential Gear and Software Recommendations
I always start by choosing a body with a low read noise floor. That choice gives me the flexibility to shoot at iso 100 and lift shadows without heavy penalties. It makes the iso invariant workflow reliable in real shoots.
A good tripod matters as much as a good sensor. Shooting steady lets me use base values and avoid blur while I protect highlights. I usually skip extended iso settings because they are simulated and do not help my final image quality.
For software, I use high-quality RAW editors and an AI denoiser. These tools handle amplification and recover detail after I brighten files. Keeping firmware current also keeps a camera performing at its peak and reduces unexpected noise behavior.
- Camera picks: bodies I tested that show low read noise and strong dynamic range.
- Lenses & tripod: fast glass and a sturdy tripod let me stay at iso 100.
- Software: advanced RAW editors and targeted denoise for pushed shadows.
| Item | Why I use it | Notes |
|---|---|---|
| iso invariant camera body | Low read noise; clean shadow lifts | Test before critical shoots |
| Sturdy tripod | Allows long exposures at iso 100 | Essential for night work |
| High-end RAW editor | Handles amplification and color recovery | Use before denoising |
| AI denoiser | Reduces luminance and color speckle | Apply sparingly to retain texture |
“Pick gear that keeps read noise low, avoid extended iso, and update firmware so your camera performs as expected.”
Avoiding Common Pitfalls During Editing
My post-process routine starts with the histogram; it steers every decision I make.
Pushing exposure too far often creates color artifacts and loses fine detail. I avoid big jumps with the exposure slider and make small adjustments in steps.
I always check the histogram to ensure I am not clipping shadows or highlights. That single check saves an otherwise ruined image.
When I use higher iso or camera iso values, I have less room to recover shadow detail. The read noise rises and limits how far I can push.
- I make incremental exposure changes and inspect for banding or color shifts.
- I mask areas and apply targeted denoise rather than global brute force.
- I remember the sensor has limits; no amount of software fixes a badly exposed shot.
“Small, careful moves in post keep images sharp and noise under control.”
Final rule: treat amplification like a tool, not a cure. Stay measured, check read channels, and your final photos will be cleaner and truer to the scene.
Conclusion
I want to leave you with a clear way to apply these ideas on your next shoot. Try small tests, note how your body reacts, and build a simple routine that fits your work. Use the results to refine exposures and editing habits.
Mastering the sensor and native iso values helps you get more usable detail and better dynamic range in each image. Track a few values, compare pushed files, and decide when underexposing plus post lift beats raising gain in-camera.
Remember that invariance is a tool, not a shortcut. With mindful amplification and careful post work you can raise image quality and protect highlights. Thank you for reading — test your gear, experiment in the field, and enjoy the better photos you’ll make.
FAQ
What does "understanding ISO invariance" mean for my images?
I mean how a sensor handles changing sensitivity and whether I can push exposure in post without a big noise penalty. On sensors that behave this way, boosting exposure in raw processing often gives results similar to raising camera sensitivity during capture, so I can shoot at a lower setting to protect highlights and lift shadows later.
How do I define the concept simply?
I define it as a sensor characteristic that tells me if boosting exposure after the shot gives the same noise and detail as increasing sensitivity in-camera. If the sensor is close to that behavior, I have more flexibility: I can preserve highlight detail by exposing for bright areas and recover shadow detail in software.
What role does read noise play?
Read noise is the electronic noise the sensor produces when converting charge to a digital signal. I watch it closely because high read noise reduces shadow recoverability. Lower read noise means I can lift shadows more aggressively in post without getting ugly grain.
How is analog sensitivity different from digital gain?
Analog sensitivity changes how much light the sensor collects before conversion, affecting how much signal exists in shadows. Digital gain multiplies the recorded signal after conversion. I prefer analog adjustment at base range; digital gain often just amplifies noise.
Why do invariant sensors matter for dynamic range?
They let me protect highlight detail by exposing to the right without committing to high in-camera sensitivity. Because I can brighten shadows later with comparable noise performance, I retain a wider tonal span from highlights to deep shadows.
How do invariant sensors help preserve highlight detail?
If I expose for bright areas and keep sensitivity low, I avoid clipping highlights. Later, I can lift shadows in raw processing. That workflow keeps highlight detail intact while salvaging shadow information with minimal noise penalty—on cameras that support it.
How can I identify whether my camera sensor behaves this way?
I look up lab tests from sites like DXOMARK, DPReview, and tests by photographers who publish read-noise charts. I also test my own gear: shoot a controlled scene at different sensitivities and compare lifting shadows in raw processing to in-camera higher sensitivity shots.
How do I set up a control shot to test my camera?
I use a static scene with a broad tonal range and place the camera on a tripod. I shoot one exposure at base sensitivity correctly exposed, then shoot the same exposure with higher in-camera sensitivity. I also take a base sensitivity shot underexposed by several stops to push later in software.
What specific exposures should I capture during testing?
I capture a proper exposure at base sensitivity, the same exposure at +2 or +3 stops sensitivity, and an underexposed base shot that I plan to lift by those stops in raw. I keep aperture and shutter speed constant for the comparison shots so only gain changes.
How do I analyze test results in Lightroom or similar software?
I import raws and apply identical adjustments. For the underexposed base image I increase exposure to match the higher-sensitivity capture and compare shadow noise, color shifts, and fine detail. If they match closely, the sensor is behaving like an invariant one.
How does this affect night photography practice?
For low-light shooting I often expose for highlights—streetlights and bright windows—at a lower sensitivity to avoid clipping. Then I lift shadows in post. This helps keep highlights clean while recovering usable shadow detail with manageable noise on capable cameras.
How should I manage noise and highlights in post-processing?
I prioritize highlight recovery first, then raise shadows and midtones. I use selective noise reduction on boosted shadow areas and keep global sharpening low to avoid amplifying noise. Tools like Lightroom, Capture One, and Topaz DeNoise help a lot.
Which noise reduction software do I recommend?
I recommend Topaz DeNoise AI for aggressive cleanup, Adobe Lightroom for integrated adjustments, and DxO PureRaw for optical and noise corrections. I test results at 100% before committing to heavy processing.
What are common misconceptions about shooting without changing sensitivity?
People assume that underexposing at base and lifting in post always matches higher in-camera sensitivity. That’s not true on all cameras—read noise and analog gain behavior vary. I also see the belief that higher nominal ISO always means worse highlights; in many cameras, raising ISO can reduce clipping if it involves analog gain.
What is dual native sensitivity and how do I use it?
Dual native designs give two base sensitivities with low read noise at each point. When my scene needs one of those ranges, I switch to that native setting for cleaner shadows or fewer clipped highlights. Video shooters especially benefit from dual native sensors in low light.
What gear and software should I consider for the best results?
I recommend modern mirrorless bodies from Sony, Nikon, Canon, and Panasonic, which often show better low-light performance. For software, use Lightroom or Capture One for raw adjustments and Topaz or DxO for noise reduction. Fast lenses and a sturdy tripod also help reduce noise by allowing lower gain.
What common editing mistakes should I avoid?
I avoid over-sharpening noise, applying heavy global luminance reduction that smears detail, and pushing exposure so far that color shifts appear. I also check for banding after strong lifts and work in 16-bit raw when possible to preserve tonal smoothness.

Ryan Mercer is a camera sensor specialist and imaging technology researcher with a deep focus on CMOS and next-generation sensor design. He translates complex technical concepts into clear, practical insights, helping readers understand how sensor performance impacts image quality, dynamic range, and low-light capabilities.