
I own an interchangeable camera and I know that dust finds its way inside no matter how careful I am. I hold my body facing down when I swap a lens, which cuts the chance of dirt drifting in.
Modern software makes removing dust spots easy, but a tidy sensor keeps my workflow fast and stress free. I’ll share a clear, friendly plan that helps you keep gear ready for weddings, portraits, or shoots with tight deadlines.
Regular maintenance saves time and keeps images sharp. I explain practical steps, safe habits, and common pitfalls so you can fix dust and get back to shooting.
Key Takeaways
- Keep your camera facing down when changing a lens to limit debris.
- Routine care prevents stubborn spots and speeds postwork.
- Use gentle, approved methods and avoid risky shortcuts.
- Software can remove dust, but prevention is more efficient.
- Learning this skill boosts confidence on client shoots.
Understanding Sensor Dust and Its Impact
Tiny specks can hide until a bright, even background reveals them, and that surprise costs time.
Identifying Dust Spots
I often use Lightroom’s Visualize Spots feature to invert an image and boost contrast. That trick makes dust particles stand out against a plain sky or white wall.
Shooting a test at f/16 or f/22 is the most reliable method I use. High apertures turn those specks into clear marks on the image.
Why Aperture Matters
Dust is not always visible at wide apertures. A wide-open lens will often mask spots that only appear when you stop down.
- I compare the same spot across multiple images to confirm it’s on the sensor.
- When changing lenses in windy conditions, I take extra care to avoid letting dust into the body.
- I always check final shots on my computer at 100% zoom before major edits.
How to Clean Camera Sensor Safely
Before I touch any internal parts, I make a calm plan and set up a dust-free workspace.
Safety first: if you are not fully confident, seek professional service from the manufacturer or a trusted shop. That avoids damage and preserves warranties.
I always charge my battery fully before using the built-in cleaning mode. A full battery prevents the mirror from dropping mid-process and causing harm.

My routine starts with the camera’s vibration cleaning, which often dislodges light dust particles. If spots remain, I take controlled, step-by-step action.
- I prepare a tidy surface and limit drafts while changing lenses or working on the body.
- I perform a test shot at a high aperture against the sky so remaining dust is obvious in images.
- I follow the manufacturer’s steps whether using a DSLR or mirrorless model.
With practice I cut service costs and keep gear ready for shoots. When in doubt, professional cleaning is the wise choice.
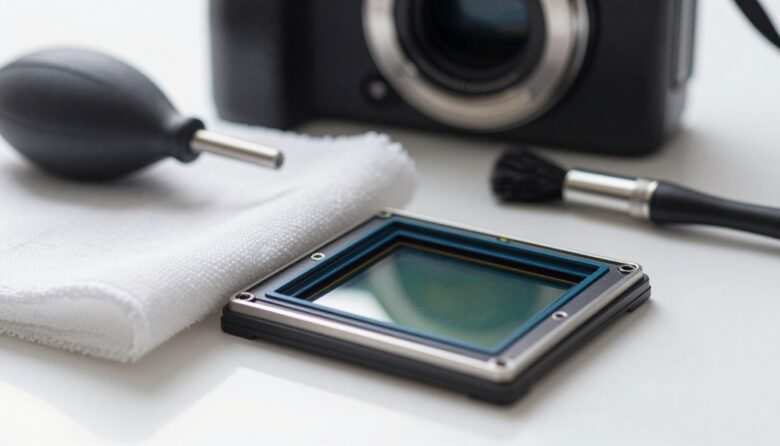
Essential Tools for Your Cleaning Kit
A small, reliable toolset has saved me from last-minute retakes on busy shoots. I pack a compact kit that covers gentle maintenance and quick checks.
What I carry:
- I always make sure a high-quality blower is in my bag. It’s the safest first step for removing loose dust.
- Lint-free swabs sized for my body prevent residue and avoid scratching the sensor glass.
- A Carson SensorMag loupe helps me inspect the surface; its LED lights reveal stubborn particles clearly.

Selecting the Right Swabs
When I pick swabs, I match the width precisely to my format so I don’t risk damage. I never use compressed air; the pressure and propellant can harm delicate parts.
Investing in professional-grade tools has paid off. A reliable blower, proper swabs, and a magnifier give me a safe, repeatable step-by-step routine that keeps my camera sensor ready for shoots without needless trips to service.
Performing a Dry Sensor Clean
I start with a quiet workspace and steady hands. For most jobs, a dry pass removes loose dust and avoids riskier steps. I make sure the battery is full so built-in locks stay stable.
Using an Air Blower
I hold the body upside down while giving gentle puffs from a quality blower. Gravity helps pull particles out of the mount.
- I never let the blower tip touch the surface; that could cause a scratch.
- After the dry pass, I take a test shot at a high aperture and check images at 100% on my computer.
- For stubborn bits, the Eyelead SCK-1 gel stick can lift debris that air missed; I dab it lightly rather than drag it.
The Role of Sensor Magnification
A loupe or magnifier reveals tiny dust particles that escape quick checks. I inspect the surface closely so I can decide if a wet method is needed.
Note: older bodies such as the Nikon D600 sometimes showed oil spots that require more than a simple blower. After any dry step, I recheck images and plan the next step.
Advanced Wet Cleaning Techniques
A controlled wet pass is the step I reserve for particles that resist every dry attempt.
Choose the right kit. I use VSGO cleaning kits because each one matches full-frame or APS-C bodies. The correct swab size prevents accidental contact with the mount and reduces the risk to internal parts.
I apply only two drops of fluid onto the swab. One smooth drag across the imaging glass removes most debris. Then I flip the swab and return with the clean side.
“I discard swabs after a single use. Reusing a swab is the fastest way to move dust back across the surface.”
- Use high-quality swab and approved solution to avoid damage sensor components.
- If streaks appear, repeat the pass with less liquid — streaks are usually excess fluid.
- Finish with a test shot at a high aperture and inspect at 100% for remaining spots.
| Kit | Swab Size | Fluid Drops | Result Example |
|---|---|---|---|
| VSGO Full Frame | Full-frame swab | 2 drops | Clean pass, no streaks |
| VSGO APS-C | APS-C swab | 2 drops | Safe coverage across sensor |
| Disposable Gel | Small pad | Use sparingly | Good for tough particles |
Conclusion
Keeping gear dependable starts with a few careful, regular checks that fit into any shoot day. I hope this guide gave you the confidence to clean camera sensor parts yourself and save time and money on service fees.
Make routine maintenance—like a quick pass with a blower—part of prep. I find that steady upkeep keeps equipment ready and limits visible dust on images.
When stubborn particles remain, follow safe tips or seek professional service. Once you master the process, a wet or dry pass becomes a simple task you can do after lens changes or before big jobs.
Prioritize safety, use the right tools, and stay proactive so every photo is free from distracting spots.
FAQ
What causes dust spots on my images and how do I spot them?
Dust on the image plane shows up as dark, soft-edged marks, usually visible against uniform skies or flat backgrounds. I check photos taken at small apertures (f/8–f/22) of a clear sky or white wall — dust stands out there. Changing lenses in windy or dusty places raises the risk, and fingerprints or oil will leave different, often smeared, marks.
Is it safe for me to remove particles myself or should I send gear for professional service?
I recommend a staged approach: start with noncontact methods like a rubber air bulb. If spots persist and you’re uncomfortable with wet methods, professional cleaning from Nikon, Canon, Sony, or a trusted camera shop is the safest choice. Service is wise when multiple passes fail or if you fear scratching or damaging the sensor’s coatings.
What basic tools should I keep in my kit for routine maintenance?
I keep a manual air blower (no canned air), sensor-specific swabs sized for my camera’s format, and a reputable sensor cleaning fluid. Also handy: a loupe or magnifying light, microfiber cloths, and a charged battery so the shutter can lock open. Brands like Giottos and VisibleDust make reliable tools.
How do I perform a dry cleaning step safely?
I first lock the mirror up or enable sensor cleaning mode per the camera menu, remove the lens, and use short bursts from a rubber blower to dislodge loose particles. Keep the camera facing down so gravity helps. Never blow with your mouth or use canned air — that risks moisture and propellant deposit.
When should I use wet swabs and how do I do it correctly?
If dust remains after blowing, I use a single wet pass with a sensor swab and a drop of sensor-grade solution. I follow the manufacturer’s directions: a single gentle sweep from one side to the other, then a dry swab if needed. Use the correct swab size for APS-C or full-frame and avoid reusing swabs.
What role does aperture play when testing for dust?
Smaller apertures increase depth of field and make dust more visible in photos. I shoot test frames at f/11–f/22 to reveal even tiny particles. If images look clean at wide apertures but show spots at narrow ones, it’s likely sensor dust rather than lens issues.
How can I prevent sensor contamination while changing lenses in the field?
I minimize exposure by removing and attaching lenses quickly, keeping the camera body facing down, and working in calm, sheltered areas. I also keep caps handy, use a clean strap to shield the rear element, and avoid swapping lenses near sand, salt spray, or heavy wind.
What should I avoid doing because it can damage the image plane?
I never use household cleaners, tissues, or cotton swabs on the image plane. I avoid canned air, breath, and excessive force. Repeated scrubbing or using the wrong fluids can scratch the coating or leave residues that worsen imaging.
How often should I check and maintain the image plane on my DSLR or mirrorless body?
I inspect after heavy lens changes, travel, or shooting in dusty environments. Routine checks every few months work for casual use, but pros shooting outdoors check weekly. Run a quick test photo at a narrow aperture before important shoots.
If I still see spots after cleaning, what’s my next step?
I recheck with magnification and confirm the marks align across multiple lenses and exposures—if they do, the image plane likely needs professional attention. I contact the camera maker or a certified technician for ultrasonic or deep cleaning and repair.

Ryan Mercer is a camera sensor specialist and imaging technology researcher with a deep focus on CMOS and next-generation sensor design. He translates complex technical concepts into clear, practical insights, helping readers understand how sensor performance impacts image quality, dynamic range, and low-light capabilities.