
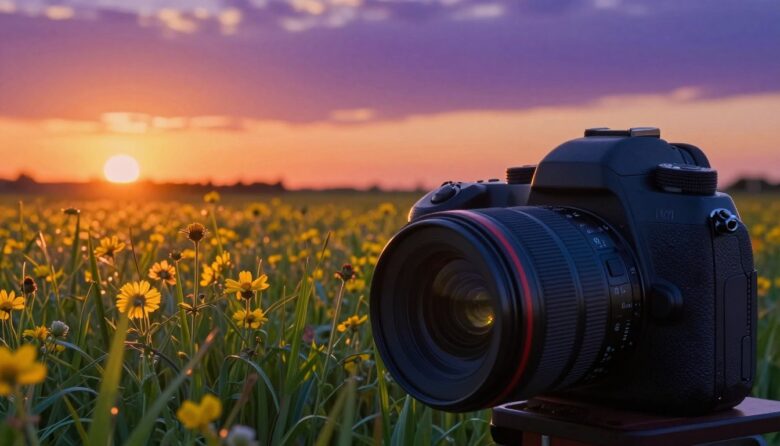
I often explain that camera dynamic range is the full span of light a sensor can record in a single image. It covers the deepest shadow to the brightest highlight and shows how much detail I can save in one shot.
When I am out shooting, I watch how my sensor and lens behave in high-contrast scenes. I use filters and practical techniques to balance exposure so the sky and front foreground keep good values and detail.
Sometimes a scene exceeds what my gear can capture, so I rely on HDR or multiple exposures to hold highlights and shadows. My goal is always a natural image that reflects the light I saw at the time.
Key Takeaways
- Camera dynamic range defines how much light detail a single image can contain.
- Sensor and lens choices affect how much detail you retain in highlights and shadows.
- Use filters and exposure techniques when the scene exceeds what the sensor can record.
- HDR and multiple exposures extend what I can capture at the time of shooting.
- Careful attention to light preserves value and detail for professional results.
Understanding Camera Dynamic Range
My working definition of camera dynamic range is the ratio of the highest to lowest luminance values a sensor captures while keeping usable detail. This idea helps me judge what a single exposure can hold.
When I look at the front of my device, I remember that the sensor’s capabilities determine how much I retain in highlights and shadows. A single scene will often have more contrast than the equipment can record.
- I choose exposure to protect the brightest areas from clipping.
- I accept that some dark details may fall away if the scene’s span exceeds the sensor’s limits.
- When I have more latitude in editing, it is usually because the capture had higher headroom.
Understanding this concept reduced my frustration with blown highlights and crushed shadows. It also made my editing faster and more predictable.
The Science of Light and Sensors
Light is the currency that sensors convert into measurable values. I view the sensor as a tool that records luminance values, and that process starts the moment the lens directs a scene onto the sensor surface.
The Role of Luminance
Luminance defines how bright each part of an image appears. I pay attention to the brightest and darkest values so I can protect useful detail.
When I manage the light correctly, the sensor keeps midtones accurate and highlights from clipping. That preserves the subtle values I want in the final image.
Signal to Noise Ratio
The signal-to-noise ratio determines how clearly I capture low-light detail. A higher ratio means the recorded signal stands above the ambient noise and keeps fine details visible.
I often think of the sensor as a collector of light, and the high dynamic measurement of a sensor shows how much light it can record before the signal is lost in noise.
- I rely on solid SNR to hold shadow details without noise taking over.
- Good exposure and careful lens choices help the sensor distinguish values across bright and dark areas.
Why Dynamic Range Matters for Your Photography
Understanding how much light my sensor can hold changed the way I work in contrasty scenes. It shapes every exposure I make and guides how I protect highlights and shadows.
When I shoot a high contrast scene, the capabilities of my camera decide what I can recover later. Good headroom means I keep useful details in both bright and dark areas.
I learned that using cameras with wider high dynamic range lets me push my photography further. It reduces clipping and gives me more latitude in post.
- Protect highlights: expose to save bright detail.
- Preserve shadows: keep enough signal to avoid noise when lifting dark tones.
- Choose gear: select sensors and cameras that match the light in your scenes.
By mastering how much my gear can capture, I ensure the final image reflects the full breadth of the scene. That control makes my work more reliable and more expressive.
Measuring Performance in Stops
I gauge sensor performance by counting stops; each one marks a clear shift in the light I record. That helps me understand how many values I can keep between the brightest highlights and the darkest shadows.
Understanding Exposure Values
One stop equals a doubling or halving of the light reaching the sensor. I use this rule when I set exposure to protect bright areas from clipping.
For example, many modern cameras are rated at 13 or 15 stops of light. That specification defines the usable stops dynamic range I have to work with in a high contrast scene.
“I treat stops as my practical tool: they tell me whether I will keep detail in highlights or lose texture in shadows.”
I check contrast ratios too. A 1000:1 contrast ratio translates roughly into the same span those 13–15 stops describe. Then I adjust the lens and exposure to match my intent.
| Specification | Stops | Contrast | Practical effect |
|---|---|---|---|
| Entry-level sensor | 8–10 | 250:1 | Loss of deep shadow detail |
| Mid-range sensor | 13 | 1000:1 | Good highlight retention |
| High-end sensor | 15 | 3000:1 | Wide levels, easy grading |
- I watch stops to avoid clipping highlights.
- I use exposure values to keep usable detail across an image.
The Difference Between Highlights and Shadows
When light hits a scene unevenly, I watch how much detail survives in both the brightest and darkest areas. That split is where my sensor’s dynamic range is truly tested.
I avoid blowing highlights and crushing shadows because those extremes hold the most useful detail in an image. If I lose texture in bright or dark areas, the final photograph feels flat or artificial.
High contrast can overwhelm what a single exposure can capture. I make small exposure choices to protect crucial highlights and keep a usable signal in deep shadows.
- I prioritize highlight protection when light is harsh, then lift shadows in post only if the sensor has headroom.
- Balancing exposure keeps the image natural and preserves fine detail across tonal areas.
- It is my responsibility to know how my sensor records extremes so the final image reflects the true tonal range of the scene.
“Protect the brightest values first; you can usually recover shadow detail without losing realism.”
How to Meter for High Contrast Scenes
Before I press the shutter, I treat metering as a decision: which values matter most in this frame?
Reflective light metering measures the light bouncing off the subject. I use it to set exposure so the photographed areas keep useful detail.
When I need midtone accuracy, reflective metering helps preserve textures in faces, foliage, or architectural parts. It guides my exposure for the parts of the image I care about most.

Incidental light metering
Incidental metering measures the source of light itself. I switch to it when the sky or a strong backlight threatens to blow highlights.
By metering the light source, I protect highlights and keep the sensor from clipping the brightest values. That gives me room to lift shadows without heavy noise.
- I choose the mode based on subject importance and the contrast of the scene.
- I check exposure with a quick test shot and histogram to confirm highlight protection.
- Photographers who master metering handle high dynamic scenes more confidently.
“Meter deliberately; it’s the single best habit to protect the most important part of an image.”
Techniques for Managing Challenging Lighting
When light throws extremes across a scene, I reach for methods that stitch detail back together.
I often use HDR to combine multiple exposures. By bracketing shots I capture a wider high dynamic range than a single exposure allows.
I mount my camera on a tripod to keep frames aligned for blending. Stable gear makes the process faster and keeps moving areas clean.
I meter for the brightest areas first to protect highlights, then bring up shadows in post only when the sensor has headroom.
Blending images is a craft: I watch edges, matching tone and grain so the final image looks natural.
- Use bracketing and hdr merging for extreme contrast.
- Lock the lens and tripod to avoid ghosting between exposures.
- Balance sky and foreground by protecting bright areas and retaining shadow detail.
“A small set of reliable techniques keeps my photos honest when lighting gets hard.”
Comparing Film and Digital Mediums
Shooting both film and digital taught me to adopt distinct exposure habits for each medium. Each responds to light and contrast in its own way, so I change how I meter and expose based on the tool in my hands.
Exposing to the Right
With modern digital gear I often expose to the right. I push exposure slightly to keep shadow detail usable, because the sensor recovers dark areas better than blown highlights.
By contrast, I treat film more cautiously. I protect the brightest values first and avoid overexposing highlights. Film often holds pleasing tones even when midtones shift, but highlights are harder to regain.
- Practical tip: test how many stops each medium holds in your lighting before a shoot.
- Why it matters: knowing limits helps me balance contrast and preserve key values in the final image.
- My rule: protect highlights on film; favor shadow headroom with digital when possible.
“Understanding how each medium records light lets me expose confidently for every scene.”
The Impact of File Formats on Data Retention
File format choice directly affects how much tonal information I can keep from a single exposure.
I always shoot in RAW because it gives the highest bit depth and the best chance to recover highlights and shadows. Using 12 or 14 bit files preserves subtle levels and lets me push exposure in post without harsh artifacts.
When I compare RAW to JPEG, compression clearly trims away usable data. JPEG files are smaller, but that loss limits the dynamic range I can recover and reduces fine detail in areas of high contrast.
The JPEG XT standard, launched in 2015, improved bit depth and extended range for some workflows. Still, I prefer raw sensor data because it keeps the sensor’s full capabilities and gives me more control.
My workflow uses RAW + careful metering and occasional HDR bracketing. These techniques maximize data retention so my final images hold true value and usable details from both highlights and shadows.
Using Filters to Control Exposure
I rely on physical filters when the sky and foreground show very different brightness levels. Placing a filter in front of my lens helps me manage exposure so highlights and shadows both hold useful detail.
Graduated Neutral Density Filters
I frequently use a graduated neutral density filter to cut the light in the sky. That simple move balances the dynamic range of the scene and keeps the foreground from falling into darkness.
The density of the filter matters. A stronger density darkens the bright part of the image without shifting the shadows. This protects highlights and reduces the need for heavy post-processing.
“By metering the bright areas and adding a graduated neutral density, I preserve both sky texture and foreground detail.”
Polarizing Effects
A polarizing filter trims reflections and deepens a blue sky. It also improves local contrast and can make clouds pop without raising exposure.
I carry a small set of neutral density and polarizing pieces. Together they let me shape the light in landscapes and control contrast across different areas of a scene.
- I use graduated ND to darken the sky and save highlight detail.
- I select density based on how much the sky outshines the land.
- Polarizers reduce glare and increase color saturation without extra exposure.
- Filters let me capture the full range of a scene without complex blending later.
| Filter Type | Primary Effect | When I Use It |
|---|---|---|
| Graduated ND | Darkens bright sky areas | High contrast horizons, sunrise/sunset |
| Neutral Density (solid) | Reduces overall light | Long exposures for motion blur |
| Polarizer | Cuts reflections, enhances sky | Water, foliage, deep blue skies |
Practical tip: test filter densities before a shoot so you know how much they affect exposure and detail. Filters are simple tools, but they often solve problems that HDR and heavy editing cannot match.
Advanced Strategies for Low Light Situations
When light is scarce, my choices before the shutter define the final image.
I focus first on signal-to-noise control. A clean capture starts with sensible exposure and a solid tripod or stabilization. That protects shadow detail so I can lift tones without brutal noise.
I rely on the sensor’s ability to deliver a high dynamic range when possible. Pulling detail from dark areas works best if I keep highlights intact and avoid clipping bright points.
When a single shot can’t hold the full contrast, I bracket and use HDR blending. Multiple exposures let me merge images and retain both highlights and shadows with fewer artifacts.
- Meter for the brightest area you must save; protect it first.
- Use slower shutter speeds only with a steady support to maintain sharpness.
- Limit ISO increases; noise control beats aggressive brightening later.
“Take time to set up: steady gear and measured exposure make night photography predictable.”
These techniques keep contrast manageable and help me produce sharp, detailed photos even when the lighting is unforgiving.
Pushing the Boundaries of Modern Sensor Technology
New sensor designs keep surprising me by extending usable stops and preserving highlight detail I once lost.
I am constantly amazed that modern sensors now edge toward the human eye’s ~20 stops. That progress changes how I expose, edit, and think about contrast in a scene.

Future Sensor Developments
I expect continued improvements in readout circuitry and processing. These will capture more light and record wider levels in a single image.
For now, I still use hdr blending to push my current gear. But I look forward to sensors that let me keep both highlights and shadow detail without multiple exposures.
- I watch new models and technical briefings to stay current.
- I test each improvement in real shoots to see practical gains.
- I adapt my workflow as sensors deliver cleaner low-light capture and better tonal preservation.
“Better light capture will give photographers more freedom to record the contrast we see, not what our tools can only approximate.”
Conclusion
The way I read a scene now starts with identifying the values I must preserve. This habit changed how I set exposure and how I use my camera in the field.
I learned that balancing light helps me capture an image that holds both highlight texture and shadow detail. When contrast is high, small choices matter most.
I often think of Ansel Adams and his Zone System. His work taught me that every great image is a careful dance between light and shadow.
I hope this guide helped you see how to use these ideas in your own photography. Go out, test settings, and make images—each scene is an opportunity to tell a story.
FAQ
How do sensors capture the full span from highlights to shadows?
I explain it like this: sensors record light as electrical signals. The brightest areas push those signals toward the top limit, while dark areas sit near the floor. The usable span between those limits determines how much detail I can retain in both highlights and shadows when I expose a scene.
What does "understanding camera dynamic range" mean for my photos?
It means knowing how many stops of tonal detail your gear can capture. That helps me plan exposure, choose lenses and files, and predict when I’ll need help from techniques like bracketing or filters to balance contrast in tough lighting.
How does luminance affect what my sensor records?
Luminance describes the perceived brightness of each part of the scene. I use it to prioritize where I want to keep highlight detail or rescue shadow texture, because sensors respond differently across the luminance scale.
What is signal-to-noise ratio and why should I care?
Signal-to-noise ratio compares useful image data to random electronic noise. When the ratio drops—often in deep shadows or high ISO—you lose clean detail. I lower ISO, expose wisely, and use noise reduction to protect that ratio.
Why does this topic matter for my photography?
Because it directly affects image quality. Better handling of highlights and shadows gives me more creative control, fewer blown highlights, and richer shadow detail, making images that look closer to what I saw with my eyes.
How are performance and "stops" related?
Stops are a shorthand for doubling or halving light. When I say a sensor has more stops, I mean it captures a wider range of tonal values between dark and bright. That tells me how forgiving the gear is in contrasty scenes.
What are exposure values and how do they tie in?
Exposure values combine aperture, shutter speed, and ISO into a single scale. I use EV to predict how many stops I can shift exposure before losing detail, which helps me choose whether to protect highlights or brighten shadows.
What separates highlights from shadows technically?
Highlights sit near the sensor’s upper limit where clipping happens; shadows live close to the noise floor. I balance exposure to preserve important highlight detail while keeping shadows above the noise threshold.
How should I meter for high-contrast scenes?
I often meter for the most important midtones or the brightest parts I want to protect. From there I decide whether to underexpose to save highlights or use bracketing and blending to capture the whole tonal span.
When should I use reflective metering versus incidental metering?
I use reflective metering for subjects with predictable reflectance, like portraits on neutral backgrounds. Incidental (or incident) metering works better when I need to measure the actual light falling on a subject, especially in mixed or deceptive scenes.
What techniques help manage challenging light?
I rely on exposure blending, graduated neutral density filters, fill light, and bracketing. Shooting in raw and exposing to the right when appropriate also gives me more leeway to recover details in post.
How do film and digital mediums differ in handling wide tonal spans?
Film often has a more gradual roll-off in highlights, giving a different aesthetic, while modern sensors tend to capture cleaner shadows and higher sensitivity. I choose the medium based on the look I want and the scene’s contrast.
What does "expose to the right" mean and when do I use it?
It means shifting exposure so histogram data leans toward brighter values without clipping. I use it to maximize signal-to-noise in shadow areas, then pull exposure down in raw processing to preserve highlight detail.
How do file formats affect data retention?
Raw files store more tonal steps and color depth than compressed formats. I shoot raw when I need the most recoverable detail, because those extra bits help me rescue highlights and shadows during editing.
When are graduated neutral density filters useful?
I use graduated neutral density filters when the sky is much brighter than the foreground. They darken only part of the frame, which helps balance exposure without sacrificing foreground detail or relying solely on blending techniques.
What do polarizing effects do for high-contrast scenes?
Polarizers reduce reflections and deepen skies, which lowers overall scene contrast in key areas. I turn to them to boost color saturation and manage bright highlights from reflective surfaces.
What advanced strategies help in low-light situations?
I combine wide apertures, steady support, careful ISO control, and longer exposures. I also consider multi-frame stacking and noise reduction workflows to preserve texture and limit grain in deep shadows.
What sensor developments should I watch for?
I follow improvements in full-well capacity, better analog-to-digital conversion, and back-illuminated designs. These advances push bit depth and reduce noise, letting me capture more usable tonal steps in a single exposure.

Ryan Mercer is a camera sensor specialist and imaging technology researcher with a deep focus on CMOS and next-generation sensor design. He translates complex technical concepts into clear, practical insights, helping readers understand how sensor performance impacts image quality, dynamic range, and low-light capabilities.