I’ve spent years studying how intense light affects photography gear. In my work I’ve seen a single beam leave lasting artifacts and, in rare cases, force full replacement of a camera sensor.
What I’ve Learned From Shooting in High-Risk Lighting Conditions
From my own experience working in environments with intense lighting, I’ve learned that most damage doesn’t come from obvious mistakes, but from small moments of inattention. There were times when I thought a quick shot toward a stage light wouldn’t matter, and while nothing happened immediately, reviewing the footage later made me more cautious about repeating that behavior.
I don’t believe in overreacting to every bright source, but I also don’t ignore the risks. Not every beam will damage your sensor, but it only takes one poorly timed exposure to create a permanent issue. What helped me the most was developing simple habits, like slightly adjusting my angle, avoiding direct alignment with strong beams, and limiting how long I stay in live view when I know the environment is unpredictable.
I’ve found that awareness during the shoot is far more effective than trying to fix problems afterward.
If there’s one practical tip I always follow, it’s this: treat any concentrated light source as something to manage, not ignore. Even basic precautions, like repositioning yourself, testing short clips first, and checking your footage early, can make a real difference. It’s not about avoiding these situations entirely, but about working smarter so your equipment stays reliable over time.
Understanding the difference between a temporary flare and true permanent harm is one of the top questions I get. I’ll explain why a pointer or high-intensity source can ruin pixels, how lenses and shutter choices change risk, and what to watch for during a video or live event.
This short guide will give clear answers and practical pointers so you can protect your kit and avoid costly cases where gear is rendered unusable.
Key Takeaways
- I explain why a direct beam can cause lasting sensor harm and what that looks like.
- One exposure can be enough to ruin high-end gear; caution matters.
- Shutter, viewfinder use, and lens setup affect your risk profile.
- Learn to tell temporary flare from permanent pixel loss.
- Simple safety steps reduce chances of costly repairs or replacements.
Understanding Laser Damage on Camera Sensor Risks
A focused beam can act like a tiny heat source that changes a chip’s structure in seconds.
The physics is straightforward: a lens concentrates power into a small spot. That raises local temperature and can alter microscopic circuitry in colorsensitive pixels.
The Physics of Sensor Burning
Industry tests show thresholds from about 10,000 to 60,000 W/cm² for continuous beams. Even a modest 5mW pointer has caused permanent harm in tight-focus cases.
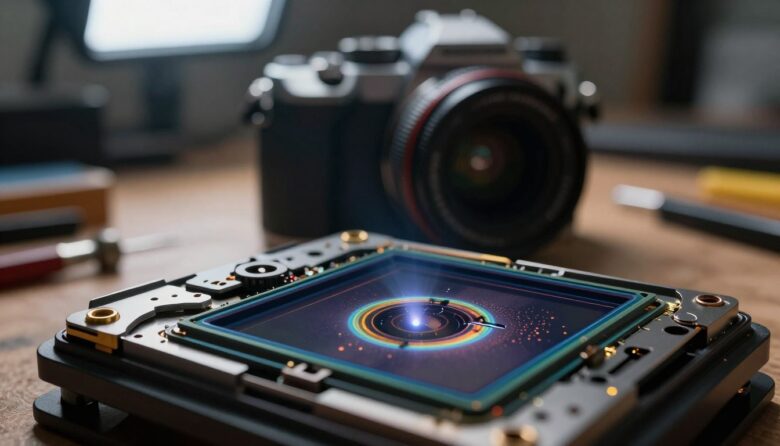
Identifying Permanent Damage
Permanent defects are obvious: dead pixels, clustered dots, or thin lines that show in every shot regardless of exposure or color. Both CMOS and CCD chips share this vulnerability.
- I treat every visible beam as a risk to my kit and to eyes; dwell time matters more than a single glance.
- ILDA guidance notes modest sources can create lasting defects if allowed to dwell.
Why Mirrorless and Video Modes Increase Vulnerability
When you switch to live view or video, the sensor often stays active and that widens the risk window. Mirrorless models feed an electronic viewfinder constantly, so the imaging element is live for long stretches during events.
That continuous operation means a concentrated beam has more time to affect pixels. By contrast, a DSLR’s mechanical shutter usually keeps the chip shielded except at the instant of exposure.
Research and field reports show prolonged recording raises the chance of permanent harm. Many photographers used DSLRs for years without issue, then saw problems after switching to mirrorless video setups.
- I find mirrorless bodies are higher risk because the electronic viewfinder keeps the imaging element active.
- Shooting long clips invites a beam to linger on the same pixels for the whole take.
- A DSLR and its shutter reduce exposure time and thus lower probability of harm.
I recommend using the fastest practical shutter and avoiding live view when bright beams are present. Even a small pointer can cause lasting damage if it dwells on one spot too long.
Real-World Scenarios and Equipment Hazards
I’ve seen real shows where bright beams turned trusted equipment into costly repairs. Live events, medical suites, and surveillance setups each present different risks for imaging gear.
Concert and event lighting
At concerts, staged beams can cross photo pits and burn pixels in a single pass. I know a case where a photographer paid about 500 euros to fix a full-frame DSLR after a direct hit.
Medical and industrial sources
Medical pulses are especially severe. During a tattoo removal shoot, a mirrorless rig suffered sensor failure that cost roughly $2,200 to repair. Those systems emit huge peak power and can destroy pixels in seconds.
Surveillance and infrared risks
Outdoor security cams are often targeted with IR pointers. Most incidents cause flare rather than total loss, but repeated hits and focused beams still pose a real threat.

- I’ve seen shows where 12 Barco projectors were harmed because beams were misaligned.
- If you film medical procedures, use a protective filter to guard your gear.
- At events, watch where beams point and protect lenses and view with care.
Practical Strategies for Protecting Your Gear
When you plan to shoot near bright beams, simple physical steps cut risk more than relying on optics alone.
I prioritize barriers first, then filters. Certified safety fabrics (EN 12254) and custom curtains stop stray beams before they reach your lens. Dome housings or hard casings work well for fixed installs.
Choosing the Right Filters and Barriers
Neutral Density (ND) filters reduce overall light, but they do not guarantee protection against a direct beam. Narrow-band filters can block specific wavelengths, yet they may shift color and cost a lot.

- I use a physical barrier when risk is high, not just a filter.
- I protect my eyes and avoid the optical viewfinder during shows.
- I carry a backup camera for risky shoots and consult a safety specialist for Class 4 systems.
Always consult a laser safety specialist before filming with high-power systems.
| Option | Effectiveness | Cost | Notes |
|---|---|---|---|
| Safety fabric (EN 12254) | High | Moderate | Good for curtains and drapes |
| ND filter | Low–Medium | Low | Reduces exposure, not beam protection |
| Narrow-band filter | Medium–High | High | Blocks specific wavelengths; may alter color |
| Dome housing | High | Moderate–High | Best for permanent outdoor cameras |
Final Thoughts on Laser Safety for Photographers
I’ve learned that a few simple habits separate safe shoots from costly repairs.
Keep your kit protected and stay aware at events where a focused beam is present. Even a small laser pointer can cause lasting damage if it lingers on the imaging element for too long.
Prioritize eye and equipment safety: avoid live view when bright sources sweep the stage, use barriers or filters when needed, and carry a backup if you expect risk.
If you have more questions about laser safety or need practical tips for a specific shoot, reach out. I want you to keep capturing great photos and video without costly repairs to your camera or sensor.
FAQ
Can bright beams permanently ruin my camera’s imaging chip?
I’ve seen concentrated beams—especially from handheld pointers or stage rigs—leave permanent marks on sensors. Intense focused light can melt microlenses or burn photosites, creating bright or dark pixels and lines that don’t go away after cleaning or firmware fixes.
How does intense light actually harm the photosensitive array?
The effect comes from energy absorption. When a collimated beam hits the pixel layers it can heat and alter the silicon and metal layers beneath the microlens. That can change sensitivity and cause stuck pixels or visible scars in images and video.
Are mirrorless bodies more at risk than DSLRs?
Yes. I avoid pointing powerful beams at mirrorless models because their electronic viewfinders and open sensors during live view expose the chip directly. In DSLRs, the mirror and optical viewfinder offer some protection when the mirror is down and the shutter is closed.
Does recording video or using live view increase the chance of harm?
It does. Live view and video modes keep the sensor active and gathering light for long stretches. That sustained exposure raises the risk of thermal effects that can alter or destroy pixel elements.
What settings make my gear most vulnerable during a shoot?
High ISO and long exposures can worsen visible effects, but vulnerability comes mainly from concentrated energy hitting the chip. Short bursts from a powerful source can cause damage even at low ISO, so caution matters regardless of camera settings.
Do concert and stage lighting present a real threat?
Some do. I’ve encountered high-powered diode and solid-state fixtures that, when aimed directly at sensors from close range, can create problems. Most production lights are safe from typical audience positions, but professional spotlights and lasers used onstage can be hazardous.
What about medical or industrial beams near a shoot—should I worry?
Absolutely. Class 3R and above handheld devices and industrial diodes emit concentrated energy. If I’m near medical or factory equipment, I keep distance and ask operators to avoid pointing beams toward cameras or people’s eyes.
Are surveillance and IR illumination systems dangerous to my camera?
Infrared floodlights and illuminators can saturate and heat sensor layers, especially in night-vision setups. I recommend using IR-cut filters or avoiding direct exposure from close-range IR sources to keep the chip intact.
What protective measures do you recommend for shoots with strong beams present?
I use optical filters that block specific wavelengths, attach neutral-density filters to reduce overall irradiance, and position myself and my kit out of the direct beam path. When possible, I request that lighting technicians avoid pointing intense sources at cameras.
Are commercially available front-element filters enough to stop high-energy beams?
Basic UV or clear protective filters can reduce minor risks, but they may not stop high-power emitters. For serious protection, specialized laser safety filters or optical glass rated for high irradiance are more reliable.
If my images show bright lines or spots after exposure, is the sensor ruined?
Persistent bright or dark artifacts after tests at various settings often indicate permanent pixel or microlens damage. I suggest testing with multiple exposures and contacting the manufacturer or a repair center—some issues can be repaired, but others require sensor replacement.
Can firmware or sensor cleaning fix beam-related defects?
No. Firmware and cleaning address software glitches and surface dust. Physical alteration of pixel structures won’t respond to those fixes. Only hardware repair or replacement will restore full performance.
How can I safely photograph events where there might be hazardous beams?
I scout the venue, talk with lighting crews, keep a safe distance from fixtures, use appropriate filters, and avoid direct aim into beams. Wearing eye protection and using camera covers when not shooting adds extra safety for both me and my equipment.
Do manufacturers warn about beam exposure risks in manuals?
Yes, many brands like Canon, Nikon, Sony, and Fujifilm include cautions about pointing bright sources into the lens. I always read the safety section in the manual and follow any specific guidance about exposure limits and service procedures.
If someone points a handheld emitter at my camera, what immediate steps should I take?
I stop shooting, turn the camera away, review images for artifacts, and run a sensor test at low exposure. If I see persistent defects, I contact a certified repair service and avoid further exposure until the device is evaluated.
Are there standards or ratings that indicate how much exposure a sensor can tolerate?
There’s no universal consumer rating for maximum irradiance on imaging chips. Safety often relies on class ratings for the emitter and manufacturer guidance. I recommend erring on the side of caution with powerful sources and using certified protective optics when needed.

Ryan Mercer is a camera sensor specialist and imaging technology researcher with a deep focus on CMOS and next-generation sensor design. He translates complex technical concepts into clear, practical insights, helping readers understand how sensor performance impacts image quality, dynamic range, and low-light capabilities.